We’ve all been there. It’s another bumper year for apples, you can’t fit any more apple pies in the freezer, and there’s only so many apples you can eat before they go soft. We all end up asking how to brew apple cider. Can you do it well? YES! …So,let’s look at how to make apple cider at home. From apple selection, crushing, fermenting to clearing. It’s all important, and small details can make big differences to the final product.
What is the finished goal here?
Our aim here, is to make clean, crisp, and clear cider at home, that is as good as any bought cider you could find in the shop.
It needs to still taste of apple, be at the appropriate alcohol strength, and we don’t want oxidised, stale or yeast tastes.
Phew, sounds like a big list. but don’t worry, it’s easy. We just need to go step by step and take a few precautions along the way.
Apple selection
The thing that is going to define our cider , like anything, is the ingredients. We need to choose the best apples for the job. Now if you only have one apple tree, then that’s what you’ll have to work with. However, there’s a good chance that a neighbour or friend has a tree, and maybe you can do a little trading.
Different apples will have different levels of sugars, acid, tannins and of course flavour. There are a few varieties of apple that have a good balance of all these, and will make a single variety cider. A few examples of these are Blenheim Orange, Grenadier and Katy to name a few. However, just because it’s nice to eat, doesn’t necessarily mean it’s going to make good cider. Generally we want a blend of a few different types to give a balanced cider.
We’re lucky here at the farm, we planted a small orchard about ten years ago, and we can select from Katy, Herefordshire Russet, Spartan, Red Devil, Discovery and a very old tree that we think is of Bramley type descent.
Our apple selection this year is about 60% Katy, 10% “Bramley” and equal amounts of our other varieties.
Picking up apples from the ground is generally not a problem, as the fermentation process will take care of most other small amounts of bacteria. I like to rinse my apples in a solution of StarSan/ChemSan, and if you’re really worried, then you can add Campden tablets to the juice before fermentation.

Now to get the juice out
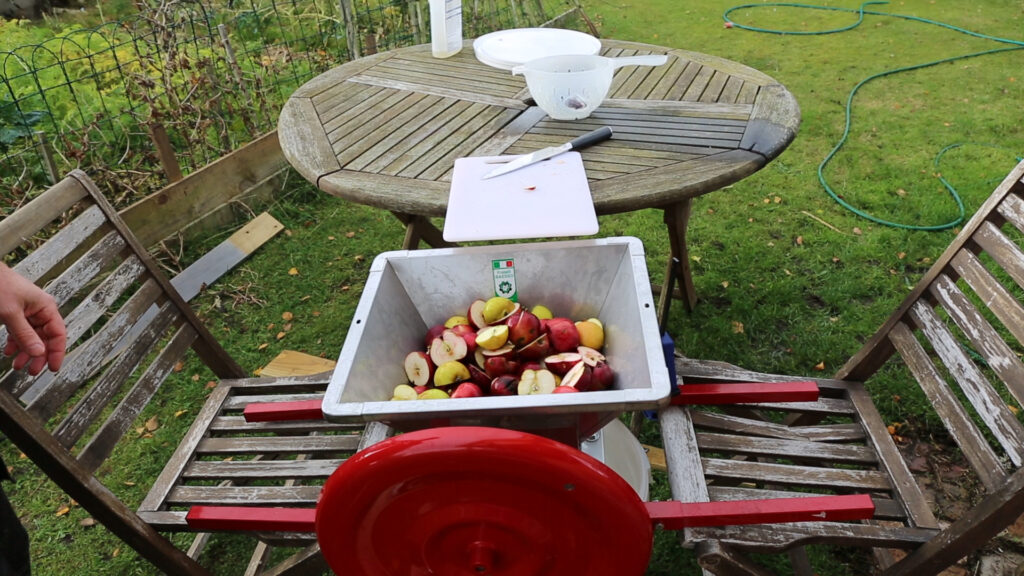
We can’t just put whole apples into a press, as the juice is locked inside cells and would give very little return. These cells need to be broken apart. To do that we need to crush the apples. Various options are available, You could mash them in a bucket with a heavy pole, you could put them in a food processor, you could walk on them like grapes…..
We use a dedicated fruit crush. It’s got a hopper on top to load into, its got teeth to grab the apples and drag them into the crushing wheels, then it has ridged wheels that squeeze the apple into a rough pulp. Even with the teeth though, we find the crush is easier and faster if we just cut each apple into halves as we go.

Pressing
We then take this apple pulp and put it into a press. If you’re looking at buying your own press, I would err on a larger and more powerful press, rather than smaller. We bought a nice stainless press which does about 2 litres of juice per press. That was great when we were doing batches of ten litres or so…. Now we are making twenty and thirty litre batches, a larger press would save a couple of hours. Oh well, on a nice day, it’s a good way of spending time outdoors….
If your press has quite a fine mesh sieve, then you can just load the pulp straight in. Ours has larger holes, so we use a mesh liner in the sieve. The liner also makes it easy to pull out the pressed pulp and empty it into the compost.

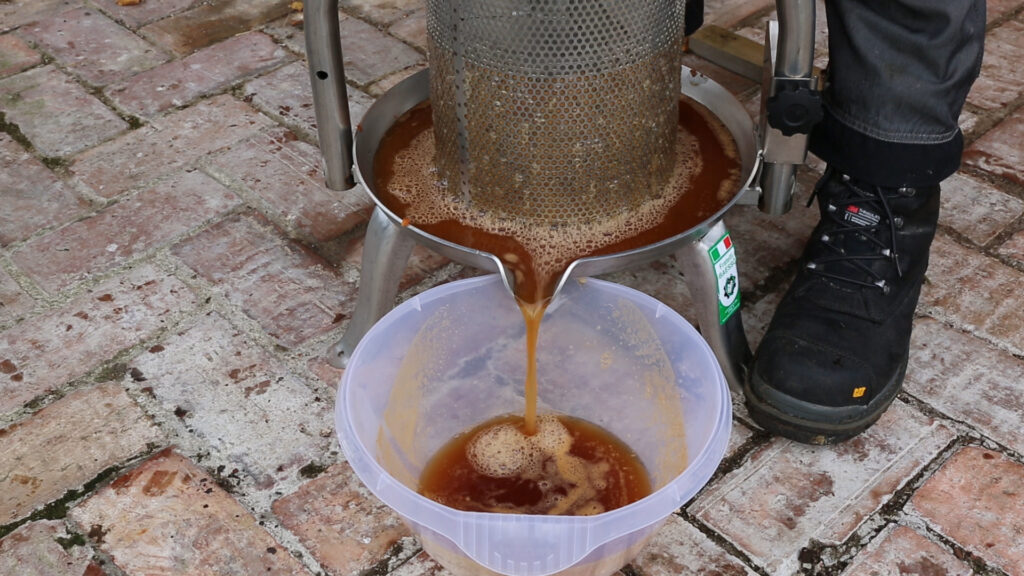
Once the press is loaded full, and the mesh folded over, we wind down the press, and the juice starts flowing. Ideally the pulp would be left to press for a few hours, or on a really big press, perhaps overnight. That way, the maximum amount of juice can be extracted. We don’t have that length of time, so we leave it to press for five to ten minutes before emptying and reloading.
Once the bowl is full, we pour the juice directly into our fermentor. Our small press means we repeat this process about ten to fifteen times until the fermentor is full.

Measuring the sugar content
Now that we’ve collected our juice, we want to check it’s gravity (sugar content) and it’s acidity.
The sugar content is going to determine, along with the yeast, how much alcohol is going to be in the final product. The simplest way of measuring this is with a hydrometer.

As we can see above, the gravity of this juice is 1.059
Now, if we put this starting gravity into an attenuation calculator, of which there are quite a few free ones on the internet, using our preferred yeast of Mangrove Jacks M02 , the predicted alcohol volume will be around 7.8%.
Adjusting the gravity
For us, this is a bit strong for everyday cider, and we prefer a strength somewhere between 5% and 6%, so we need to bring the gravity down a bit. To do that, we just add water. Some people won’t like that idea, in which case, leave it full strength, after all it’s your cider.
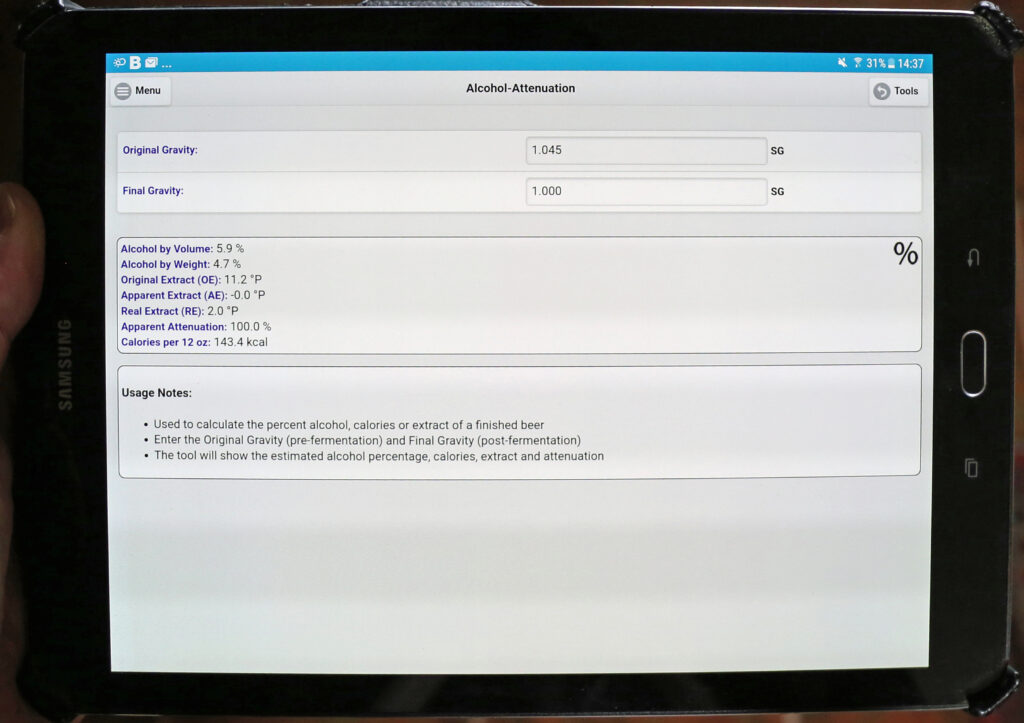
We’re not going to just randomly add water, although you could, by just adding small amounts, mixing and then re-testing the gravity, instead I’m going to use an alcohol attenuation tool and then a dilution tool on a program called Beersmith.
Ok, this is where a little experience of the yeast you use to brew your apple cider comes in handy. Through experience, I know that this yeast will always attenuate my cider to a final gravity of 1.000 or very close.
In the below picture we can see that we need a starting gravity of 1.045 to arrive at a finished gravity of 1.000 to give an alcohol volume of 5.9%. So, we need to dilute our cider to 1.045
Now we know what gravity we need. We also know what volume we have, which for this is 14 litres.
So, we then go to the dilution tool and use a bit of trial and error. We adjust the volume to add, until the final gravity shows 1.045

All we do is measure out the water and add. Simple huh? I’d still add most of it, give it a stir and test the gravity before adding it all, just in case the calculation is a little off!!!
Acidity
Acidity is important when we brew apple cider. The acidity of the juice will determine the sharpness of the final cider. If it’s too acidic, then it’ll be too sharp, and could feel like it’s taking the enamel off your teeth. If it’s not acidic enough then it’s going to lack crispness, and it just won’t feel refreshing.
The range we’re looking for is a ph of between 3.2 to 3.8. I use ph strips for cider instead of setting up and calibrating my ph meter. You just dip the strips in, and I find they’re accurate enough for this purpose.
If your ph is too high, you can add citric acid to bring it into range, and if it’s too low, then I use precipitated chalk. If using chalk, be careful to do it in small amounts and stir it thoroughly, it’s easy to go too far very fast…..
Fermentation – Time To Brew Our Apple Cider
The choice of fermentor here can make a big difference. Sure, you can ferment in a plastic garbage bin, but in order to get a clean taste, we need to keep out oxygen. From the moment you pitch yeast, consider oxygen the enemy. I’ve tried buckets, with lids, but found the seals are less than ‘sealed’. Also, the action of syphoning out the cider, introduces far to much air for my liking.
The best fermentor I’ve found is the Spiedel plastic fermentor. It has a tap on the bottom and I get another tap to go on the top. This way, I can put a blow off tube on the top tap, and sit the open end in some sanitised water as my bubbler. When fermentation is complete, I just close the top tap, carry it to my secondary/bottling bucket, put a tube on the bottom tap and do a closed transfer. No oxygen. We’ll see more of that later.
Yeast choice
So lets add the yeast. We’ve tried a number of yeasts, from wine yeast, beer yeasts and various cider yeasts. The best we’ve found is Mangrove Jacks M02 Cider Yeast. I’m not sure if Mangrove Jacks have their own proprietary yeasts or just repackage other brands, but their M02 is by far the cleanest tasting and the easiest to clear later on that we’ve found.
You can rehydrate dry yeast, and I generally do for beer, but for cider, I just sprinkle a pack on top of the juice. Done.
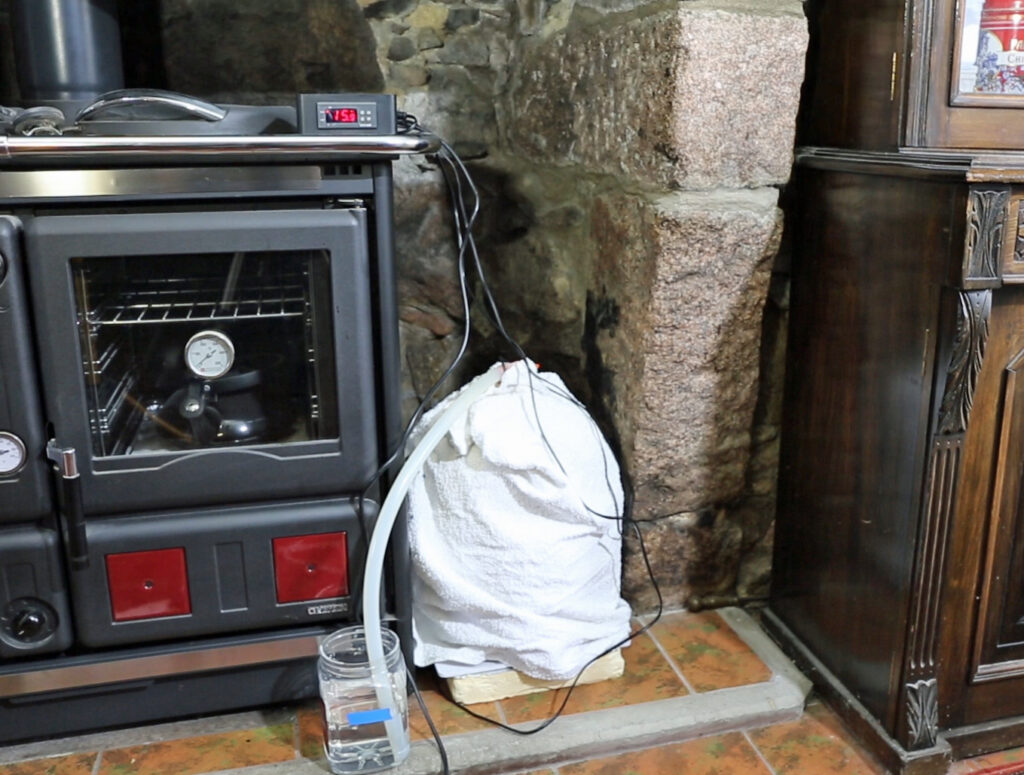
As you can see above, I wrap up my fermentor and put it somewhere temperature stable and fairly cool (the woodburner doesn’t get lit at this time of year).
It’s also on a heat mat with a temperature controller you can see up on the stove. This yeast is recommended to be fermented between 18 – 24 degrees c. However, when I brew apple cider, I ferment cooler than that, and i believe it gives me fresher apple aromas in the finished product. I set my temperature controller to 13.5c, and it usually ferments at around 16 degrees c.
At this temperature, it will be finished fermentation in 3 to 4 weeks. there is no nutrient added, and it reliably ferments to a final gravity of about 1.000 every time.

Transfer
Well, 3.5 weeks later, and fermentation is complete. Time to transfer to secondary/bottling. Here, I’m lucky enough to have a unitank, which can heat, cool, carbonate and bottle. Obviously not everyone has access to such equipment, but there are other options for a lot of this. A keg with a shortened dip tube works well here as well, and even another sealable fermentor can be adapted.
I’ve purged the tank with CO2, connected up a flow line and a return line to each vessel, then raised the fermentor up above the tank. All we do is open the taps and let gravity do it’s thing.

Cold crashing
Once the transfer is complete. we need to set the temperature below about 4 degrees c (39 f) in order to start dropping the yeast out. I like to leave it cold crashing like this for a couple of days before the next step. Cold “crashing” is just a fancy term for cooling it down…
Fining
In order to get the clearest cider we can, we’re now going to fine it with gelatin. The gelatin is positively charged at lower ph levels. This will attract the negatively charged yeast (and possibly proteins) into heavier clumps, which will then fall out to the bottom. Some yeast is positively charged and some are more negatively charged than others. This is one reason I use this M02 yeast, as it has the most significant clearing reaction that I’ve found.
In order to add the gelatin, we need to mix it into a solution.
I start with 150ml water and heat it in the microwave for between one to two minutes. We need to get it to around 77 degrees c (170 f). What we don’t want is to boil the gelatin as it can denature it and reduce it’s fining ability.
To this, we add 1 teaspoon of gelatin and mix it until dissolved. 1 teaspoon is enough to easily fine up to about 25 litres of beer or cider.

Once dissolved, we need to get this into our tank or keg/vessel. I find the easiest way to do this is with a syringe. It allows for taking the lid off the tank only a small amount and it draws less air in than it would if i were to pour from a pot or jug. After all, oxygen is now the enemy.
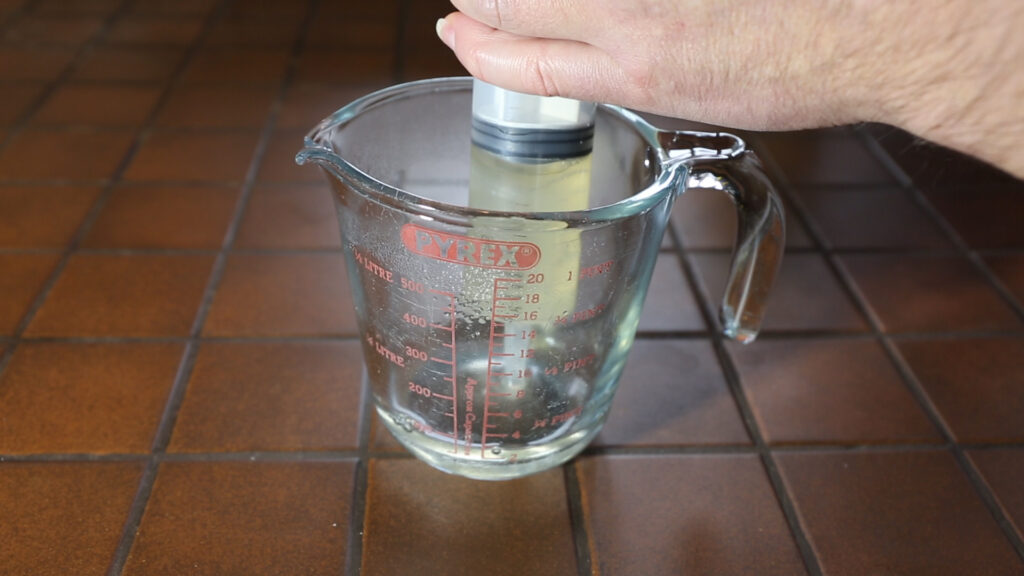
When adding the gelatin, it’s important that the cider is below 4 degrees c (39 f)
Avoid oxygen
If you have the ability at this stage, then it’s a good idea to run a positive flow of CO2 through the tank or keg, to prevent drawing in oxygen, if you don’t then just open the lid of you vessel the smallest amount you can to keep air out.
The yeast will start to fall out immediately, and as you can see below, in big clumps. The fallout is so heavy with this M02 yeast that it clogs the neck of my tank, and I have to drain it a couple of times to be able to see the cider again.


24 hous later, and our cider will be clear.
If you want dry cider, this is the point to bottle. After this, you can not carbonate with sugar, and will need to force carbonate with CO2.
Stabilising
However, our cider is going to be a sweet cider, so now we need to stabilise it. If we don’t, then as soon as we add a fermentable sugar to it, the residual yeast will begin to ferment again. This is particularly dangerous if we are bottling, as we would just be creating glass bombs.
So, first we need to stall or weaken the yeast a little. To do this we’ll use Campden tablets at a dosage of approximately 1 tablet per 5 litres or 1 gallon of cider. The Campden tablets are made of sodium metabisulphite or potassium metabisulphite. These will not stop an active fermentation, but they will weaken yeast and stall it for a while. Easiest way to crush these is between two spoons.
The second ingredient to add is Potassium Sorbate. It’s job is to stop the yeast from reproducing, so ultimately ending any further fermentation. This is added at a doseage of 1/2 teaspoon per 5 litres or gallon.
Both these should be dissolved in some water before adding.
Generally these would be added about 24 hours prior to adding sugars, however, as our cider is at 3 degrees c and we’ve dropped most of the yeast out, there’s little chance of the yeast starting to ferment. So, I’m going to dissolve these with the ‘sugar’ and add them at the same time.
Back-sweetening
For our ‘sugar’ this time I’m going to use Fructose. I find it gives the cider a more authentic fruit taste over sucrose, as it’s just adding back the fructose that is naturally in the apples before we fermented it out. This I’m adding at a doseage of 17.5 grams per litre.
Mix the Fructose, Campden tablets and Potassium Sorbate together with some warm water until the fructose is dissolved and the syrup is clear, if it’s not properly dissolved when we pour it in, the crystals will fall to the bottom and be out of solution.
Then, as with the gelatin, we’ll pour it into the tank/vessel with a positive CO2 gas flow, to prevent oxygen ingress.


Carbonation
Now to carbonate. If you’ve got this far, you’re committed to force carbonation with CO2 . This is all temperature and time. All we need to do is hold our cider at the required temperature and pressure for a length of time. When it stops absorbing CO2, it’s done. If you’re already using a keg system, then you know all about this.
Using the chart below, we decide what volume of carbonation we want, then choose the temperature and pressure we are going to use to get there. My cider is at 3 degrees c, and I want 2.4 volume carbonation, which I find is a good level for cider. However, we bottle our cider with a Blichman beer gun, and I estimate I lose about 0.4 of volume during the bottling process, so I need to start at 2.8 volumes. At 3 degrees, that means I need around 14.4 psi of CO2 pressure.


Bottling
As I mentioned, we bottle with a Blichman beer gun. This is a great tool for bottling. There is a purge ‘button’ , where you can purge the bottle with CO2 just before filling, so yet another weapon against our oxygen enemy. The other ‘button’ then fills the bottle, and we get a cap on straight away before the bottle bubbles over.
If you’re interested in using one of these, the best tip I can give, is to replace the liquid tube with a much longer hose. The standard hose at these pressures will just end up in a frothing mess, with all your bottles being half empty. I use about 20 ft of hose. This allows the cider to slow down, without losing pressure, and the bottling process is controlled and easy.

…..and finally, that’s it. How to make apple cider.
So, how does it taste????
Fantastic, if I do say so myself. The fresh apple aroma has survived, as has the real apple taste. I attribute this to the low and slow fermentation temperatures. It’s crisp, light and refreshing.
The fructose has worked very well, giving an authentic fruit sweetness, whilst not being overly sweet. This is going to go down well at summer BBQs, or maybe we’ll just keep this one to ourselves …..
Another cider idea is a spiced cider which you can find here
If you’ve made it all the way to here, well done. If you plan to brew your own apple cider, I’d love to hear how it goes. Head over to my YouTube videos, and leave me a comment.
Click here for YouTube video Part 1
Life’s Good, Drink More Cider…….

